If you've ever wanted to create wood carved caricatures, you've come to the right place. This section will teach you about safety, design, and techniques. You can transform a standard caricature into a masterpiece. These tips will help you create a unique caricature. Besides, there's always the option to take classes from caricaturists.
Techniques
Wood carving caricatures make a distinctive form of sculpture. They are amusing and can tell stories without the need for words. Caricature can be described as an exaggerated depiction of a real person. Wood carving carvers, like Dave Stetson, adhere to a strict code of realism and have certain rules that should be followed to create an effective caricature. This article will cover the basics of caricature-carving and give tips for creating one.
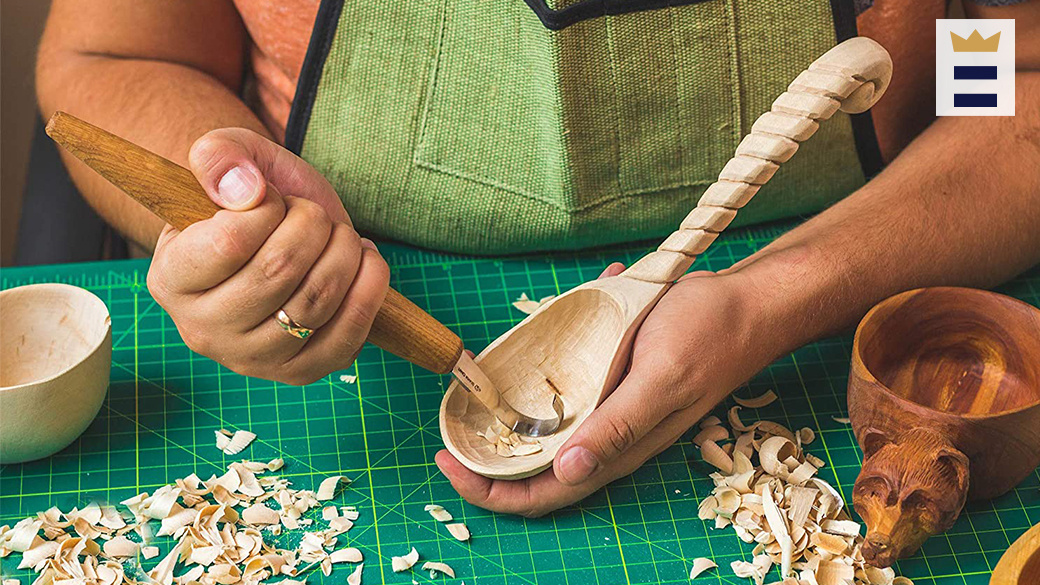
First, it takes a lot of focus to carve an astronaut. You will need to use either a spoon carving knife or whittling knife to carve an astronaut. Both are delicate tools. To make the job easier, you can use templates while you are carving the astronaut. A tutorial will give you step-by-step instructions for how to complete your caricature. You may want to consider purchasing a tutorial for this topic if your budget is tight.
Designs
There are many methods to make wood-carved caricatures. It is a good idea to use a pattern. You can also purchase a cardboard cutout and use the same patterns for carving different types of caricatures. You can also refer to a tutorial for caricature carving. This article will teach you some of the best caricature carving techniques.
The first caricature that Fred made was called 'Aristocrats of the Roads'. It showed two men-wanderers. It was carved out of Honduras Mahogany. Fred entered it in competitions, winning several awards. He also featured it in the Chipping Away Catalog. Fred also carved a caricature Luciano Pavarotti in 2009, earning him the Second Runner-Up Award at a national woodcarving convention.
Eyes
It is important to ensure realistic looking eyes when carving caricatures. Although it is fine to have realistic looking eyes, the lack of enough detail can cause viewers to be dissatisfied. You can use the following steps to ensure your eyes are symmetrical: Take a photo and trace the outline of the carving.
Next, you need to decide the shape of your eyes. Some carvers use the identical eye shape to create their eyes. Other carvers create more convincing eyes by using different shapes. You can make your eyes symmetrical by using stop cuts to cut the lower eyelid. Next, you need to carve out the pupil as well as the iris. You can now move on to the next stage of carving the caricature.
Safety
Wood carving caricatures can be unique in their design. They are capable of telling a story without using words. Their creators take great care to ensure that their work is accurate. Caricatures are depictions of people and objects that are exaggerated to communicate an impression, or humor. Dave Stetson, wood carving carver has established stringent rules for carvers safety and quality.
First clean the wood and remove pencil marks before carving a caricature. You can clean the surface with water or dish soap. You can carve the neck or head with a V-shaped tool that is 60 degrees. An easy-to-use 60-degree V shaped tool can help with the carving process. A good choice for this type of tool is the Ramelson 60-degree V-shaped carving tool, as it is sharp and easy to use.
Materials
If you are looking for a fun and challenging way to carve animals, you can learn how to create caricatures of animals with materials like wood and wire. Even though animal caricatures might not be as complex as human caricatures but they are still entertaining and can tell a story with no words. Caricatures can be exaggerated to evoke realism. For beginners, carving caricatures can be difficult. However, for more skilled carvers, there are many materials available.
The materials you will need to complete your carving include chisels and a wood board. You also need a Hammer. Acrylic white paint is the first layer of paint. You can purchase it at a craft shop. Once the base layer is complete, you can begin the second layer. This layer will include a golden brown color and a few drops (Academy) of burnt-sienna. You should apply 2 drops of sunkissed Peach to the face.
FAQ
What kind and type of wood should i use?
Oak, maple, cherry and mahogany are the most common wood types used for woodworking. Each wood type has its own characteristics which affect the final product's appearance and feel. Oak, for example, tends be darker and more hard than other woods. Birch is soft and light, and mahogany is denseer and heavier. You can also pick between veneers and solid wood. Veneers consist of thin sheets made from wood and glued together to form a single layer.
How can I tell what kind of wood I am working with?
Always check the label before purchasing wood. It should have information about the wood species as well its moisture content and whether any preservatives were used.
How much should a Woodworker Charge per Hour?
The hourly rate for a professional Woodworker will vary depending on many variables, such as experience, skill level and availability.
The average hourly rate for a skilled woodworker ranges from $20-$50 an hour.
A less skilled woodworker might charge as low as $10 per hour.
What is the minimum amount I will need to start?
Because each project is unique there are no exact numbers. Here are some factors to help you estimate how much money you will need.
-
Cost of materials
-
Tools and equipment
-
Time spent working on the project
-
Your hourly rate
-
What profit are you expecting to earn?
-
No matter if you are looking to hire someone
For those just beginning, it may be a good idea to start small with simple items like boxes and picture frames. As you gain experience, more difficult projects will become possible.
Statistics
- Woodworkers on the lower end of that spectrum, the bottom 10% to be exact, make roughly $24,000 a year, while the top 10% makes $108,000. (zippia.com)
- If your lumber isn't as dry as you would like when you purchase it (over 22% in Glen Huey's opinion…probably over 10-15% in my opinion), then it's a good idea to let it acclimate to your workshop for a couple of weeks. (woodandshop.com)
- The U.S. Bureau of Labor Statistics (BLS) estimates that the number of jobs for woodworkers will decline by 4% between 2019 and 2029. (indeed.com)
- Most woodworkers agree that lumber moisture needs to be under 10% for building furniture. (woodandshop.com)
External Links
How To
How can you accurately measure wood?
We use many methods to measure wood. We use a digital ruler (a tool to measure distances), laser level (used for leveling your work surface), and bubble level (used for levelling your work surface).
A digital caliper has two jaws that open and close. One jaw holds the object being measured and the other measures the distance between them. The digital caliper can be used to measure small distances such as the thickness of wood.
Laser levels use an infrared beam of light to project a line across the ground. The laser emits red dots on the line. By looking down the line, you can see whether the surface is even or not. For larger surfaces, laser leveling is the best method of checking accuracy.
Bubble levels look similar to a compass. The device has a bubble at its center. As long the bubble is not in the middle, the device will show you whether the surface of the object is level. The bubble levels can be used to check the accuracy of smaller areas.