
This guide will help you make intarsia art from wood. The information presented here covers Wood types, Patterns, Tools, and Techniques. This exciting craft is described in detail below. Depending on your skills, you might also consider using a different kind of wood. For those who are just starting out in this craft, it is a good idea to make a sample.
Patterns
If you are an experienced woodworker, you will be able to make a wide variety of intarsia designs, including tree ornaments, holiday ornaments, and flowers. The intarsia wooden patterns included in this book can be used by all levels of woodworkers and show the artistry that the process requires. 21 full-size Intarsia Patterns are included. There is also helpful information regarding shaping, wood and blades.
Intarsia, which uses contrasting wood species to create furniture and wall hangings, is a fun and unique way to make a piece of furniture. It is like building a puzzle with various pieces of wood placed next to one another. Each piece of wood is then stained or polished, and assembled to make a unique design. This gives the project depth and character. Making intarsia-wood patterns can be quite difficult. It is worth looking for free intarsia patterns to help you make the right choices for your project.
Tools
You need to have special tools for intarsia. A small belt-sander is a great tool to quickly remove material from the surface and smoothen out edges. A dremel, or flex shaft, can be useful if you are looking for a tool to shape and sand fine details. You will find different tools and blades for shaping small areas.
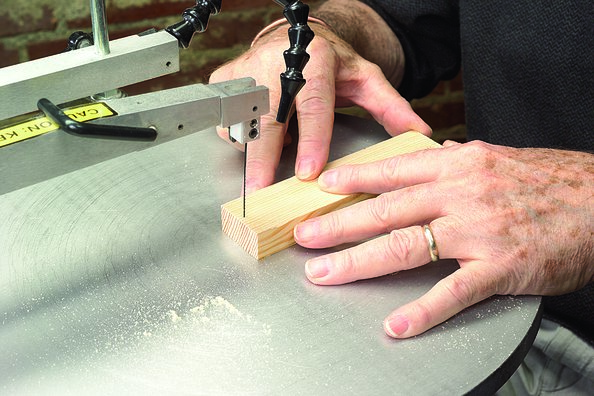
Jigsaws - Jigsaws have a limited range of capabilities. They are not capable of making the precise cuts that a scrollsaw can. Sanders are required to smoothen wood surfaces. Intarsia requires two types of wood, one with contrasting grain and color. The wood can then be stained in a variety of ways. After the wood has been cut, it is sanded to form a mosaic-like pattern.
Techniques
Amazing intarsia creations are not difficult if you follow the right steps. A pattern is an excellent starting point for your artistic creativity. These ideas will help you create stunning intarsia art. Here are some techniques:
First, select the project design. Make extra copies of your pattern. Next, select the type of wood that you want to use. Different species of wood can have unique characteristics. Your project will have a deeper and more interesting dimension if you rough out the thickness of each wood piece. You can add pieces to your project with glue by adding layers of wood. Finally, finish your project by cutting off any extra backing and leaving the fully finished intarsia piece.
Woods for use
The new book provides the tools and techniques you need to make unique inlaid pieces. Kathy's progressive approach will teach you everything from the basics of color break and the nuances thereof. This book will be an invaluable resource for anyone who is interested in learning more about this fascinating craft, even if they have never attempted it before.
First, choose woods that complement one another and have the same grain orientation. For example, a Teddy will need 20 pieces made of four different wood types. Each one has a slightly unique grain. This will require a saw with high speed blades. Once you have determined the wood's grain orientation and color, you can start cutting and staining.
Colors

Intarsia is as diverse as the wood itself. While saps and heartwoods are either reddish brown or grey black, they are both white. Some woods darken with age, like cherry. Cherry starts with a light color and becomes a medium-toned wood when exposed to sunlight. Cedar and other woods can have different tones within a board. This gives your project depth.
Intarsia is a type of art created by cutting and gluing varying pieces of wood together to create patterns. It originated in the Islamic world, but today is often associated with Italy. Woodworkers create a three-dimensional illusion by using different wood colors with varying thicknesses. Intarsia colors are commonly found on jewelry boxes and wooden chests.
Time-consuming process
Intarsia involves complex techniques and different wood types. To create beautiful intarsia patterns, artists must collect different types of wood and stains. While plywood and birch are the most common woods to use, there are many other options. The choice of wood an artist uses is completely dependent on the individual preference. Intarsia projects can be created by many craftsmen using Western Red Cedar.
Intarsia woodworking starts with cutting and labeling the inlay. The artist then glues or adheres the pieces. Once the glue has dried, the woodworker finishes the piece as with a double bevel inlay. This takes a lot of skill and results in a beautiful piece of work.
FAQ
What kind of tools do carpenters use?
Carpenters most often use a tool called a hammer. A hammer helps to carpenter pound nails into the wood. This helps to keep pieces together when they are working on a project. Other tools include clamps. pliers. screwdrivers. measuring tape. pencils. saws. drills. wrenches.
What is the difference between a hobbyist or a professional woodworker, and how can you tell?
Hobbyists enjoy creating things out of wood. Professionals tend to focus on the quality. Hobbyists take great pride in their creations, and share them with family and friends. Professionals will spend hours researching designs and then begin to create a project. They'll be meticulous about every aspect of their work, from choosing the best materials to finishing it perfectly.
What kind wood should I use for my project?
There are many wood types that are used in woodworking, including oak, maple and birch. Each type of wood has unique characteristics that affect the look and feel of the final product. Oak is a darker wood and tends to be more durable than other types. Birch is soft and lightweight, while mahogany is denser and heavier. There are two options: solid wood and veneers. Veneers are thin sheets or wood that are glued together into one layer.
How do I learn basic woodworking skills?
The best way to learn how furniture construction is to make your own bench. This project can be completed with whatever wood you have available at home. If you don't know what kind of wood to use, then go ahead and buy some cheap pine boards from Home Depot or Lowes. You'll need to sand the bench after it's built. Then, finish it with varnish or a stain.
What tools are best to begin with when I become a woodworker
Woodworking is an art. It requires patience. It takes time to master all the tools and techniques involved in woodworking.
There are many different types of woodworking equipment available on the market today. Some prefer to use power tools, while others prefer to use hand tools.
While you have the option to pick what you like, it is essential that you get the right tool for the job. If you don't have any experience, you may consider starting with a basic set of hand tools.
You could also try learning how to use a router which is used to cut intricate shapes into wood. These can be found at most hardware shops.
How do I know what tools are best suited for me?
It helps to reflect on your needs and preferences before you shop for tools. Do you prefer metal or plastic handles What size of nails and screws do your hands use most? Do you prefer to use hand tools or power tools?
Statistics
- Most woodworkers agree that lumber moisture needs to be under 10% for building furniture. (woodandshop.com)
- Woodworkers on the lower end of that spectrum, the bottom 10% to be exact, make roughly $24,000 a year, while the top 10% makes $108,000. (zippia.com)
- Overall employment of woodworkers is projected to grow 8 percent from 2020 to 2030, about as fast as the average for all occupations. (bls.gov)
- The U.S. Bureau of Labor Statistics (BLS) estimates that the number of jobs for woodworkers will decline by 4% between 2019 and 2029. (indeed.com)
External Links
How To
How to drive a nails in wood
When driving a nail into wood, it is important to first choose the correct size and kind of hammer. The most popular types of hammers include claw hammers as well as mallets and ball peenhammers. Each type of hammer comes with its advantages and disadvantages. A claw hammer, for example, is the best choice if you need to hit nails hard. However, it's not easy to know exactly where the impact will land. A sledgehammer is great for hitting large areas at once, but it's too heavy to use effectively for smaller tasks.
After selecting the right hammer, you will need to place your hand flat against one side of the head. The handle should rest comfortably in your hands. You can grip the handle with your fingers, but not so tight that it causes injury. Hold the hammer straight up, keeping your wrist relaxed. Then swing the hammer back toward the ground, aiming for the center of the nail. You should feel the impact on the nail from the hammer. If you're having trouble getting the hang of swinging a hammer, practice with a block of wood until you get the rhythm down.
When you're ready to start driving the nail, hold the hammer in front of you close to your body. Position the nail, so it's perpendicular to the surface of the wood. Your eyes should be focused on the nail's tip. Swing the hammer forward, and then move the hammerhead. Repeat this action several times, gradually increasing the speed of the swing. Try adding power to your swings when you've mastered the technique. To make it more powerful, hold the hammer up high to your shoulder and then bring it down. This will allow you to exert more energy.
Once you have successfully drilled the first hole in the nail, remove the hammer. Use a pry bar or screwdriver to pull out the rest of the nails. Keep the nails heads in line with the surface of the board to prevent splitting the wood.