
These tips should be read before you use your scrollsaw. They will help you use the saw safely and effectively. Make sure that the scroll saw is secured to the workbench. It will vibrate and slide down the workbench if it is not secured. Lastly, make sure the blades are properly installed. Once all these features are installed, it's time to begin furniture making! Then, you're ready to use your scroll saw.
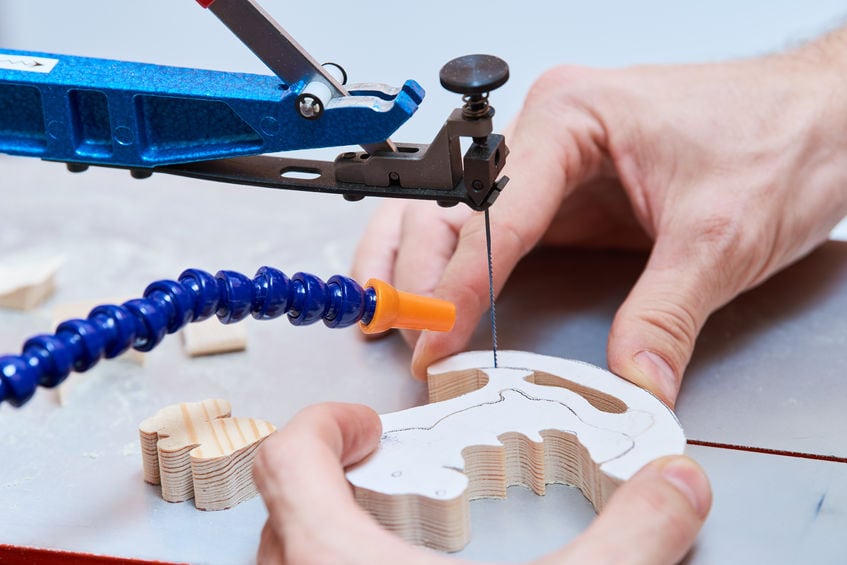
Dust blower
The General International 21-Inch Tilting Head Scroll Saw has solid upper and lower parallel arms for stable operation, as well as a built-in dust blower. The saw comes with a dust collection hookup to allow you to collect the sawdust as it moves. The saw produces precise cuts with minimal noise and has a dust blower that can be adjusted for different airflow directions. If you have a shopvac, the saw can be used for that purpose.
Tilting the table
You're here to learn how to use the scroll saw on a tilting table. Although many people enjoy spending hours at a scroll saw, hunching over it for long periods of time can cause discomfort, especially if your neck or shoulders are stiff. There are several ways to fix this problem and make your scrollsaw more comfortable.
Spiral blades
Straight blades are best for making straight cuts on your scrollsaw. It can be time-consuming to switch between straight or spiral blades. However, this can make it easier and result in better results. Spiral blades are a good choice if you want a simple blade that can be used to cut through many materials. These blades feature teeth that extend all the way to the end.
Variable speed
It is essential to choose the best scroll saw blade for you project. Scroll saw blades come in a variety of tooth sizes and configurations to suit different materials. The bigger the number, generally speaking, the more durable the blade. This is true for thicker materials. Thicker woods require smaller blades. Listed below are some of the features of the best scroll saw blades. The best scroll saw blades will cut the thickness of the material you intend on cutting.
Transferring patterns with colored carbon paper
Before you begin carving, you may want to transfer patterns onto colored carbon paper. Then, place a piece of carbon papers over the desired pattern and tape the other side. Clear packaging tape can also be used. It eliminates the need for adhesive removal and sanding. After you have taped your design onto the carbon paper, trace it with a pencil or ballpoint pen. Be careful not to move the pattern papers when you are tracing. Otherwise, you might end up cutting the wrong pattern.
Keep a variety of blades in your arsenal
A few spare blades are worth your while if you are new to the scroll saw. A scroll saw has a lot of potential for miscuts. This is why it is so important to adjust your blade tension before you start. If the blade isn’t properly tightened, it can break. It’s also a good idea for budgeting for spares. Extra blades are available at your local hardware or online.
Using a pencil with an eraser
It's a good idea for scroll saw users to draw a plan in pencil before attaching it to the workpiece. Before you begin your project, be sure to check your settings and tension the blade. Once you've drawn your design in pencil, drill 1/4" through the middle. Thread the blade through the hole and work gently out to the corners. Take care when you guide your blade so that there are no accidents.
The right blade

It can be confusing when buying a scroll saw for the first time. There are many different types of blades. You might try several to get a feel for which type is right for you. Each type of blade has its own design and function, and is made for a particular type of job. These are some suggestions to help you select the right scrollsaw blade.
FAQ
What material would you recommend to start learning woodworking?
Start with softwoods, such as pine or poplar. These two are the easiest to master, then you can transition to hardwood.
What furniture can I refinish?
Yes! There are plenty of ways to refinish old pieces of furniture without having to pay a pro. Here are a few ideas:
To remove stains and scratches, use sandpaper. Next, wipe the surface clean with a damp cloth.
Clear polyurethane varnish should be applied. Let dry completely before moving furniture around.
Paint furniture with acrylic paint.
Instead of using paint, stain is a better choice. The furniture will have a rich look thanks to the stain.
Shellac wax can be applied. You can protect your wood with wax and give it shine.
How can I learn basic skills in woodworking?
You can start building furniture by making a bench. This project can be completed with whatever wood you have available at home. If you're not sure which kind of wood to choose, you can purchase cheap pine boards at Lowes and Home Depot. You'll need to sand the bench after it's built. Then, finish it with varnish or a stain.
What kind and type of wood should i use?
The most popular types of wood used in woodworking include oak, pine, birch, maple, cherry, mahogany, teak, poplar, redwood, and bamboo. Each wood type has its own characteristics which affect the final product's appearance and feel. Oak, for instance, is darker and harder than most other woods. Birch is soft and lightweight, while mahogany is denser and heavier. You can also choose from solid wood or veneers. Veneers are thin wood sheets that are glued together to form one layer.
How does a beginner woodworker earn money?
Many people are beginning to learn how build furniture to launch an online business. If you are just starting to build furniture, there are many other ways to make money than selling on Etsy. You could also sell at craft fairs, or other local events. You could also offer workshops to help others learn how to make their own furniture. Consider offering your services if you have previous experience as a builder or carpenter.
How can I organize my shop?
First, make sure you have a designated space for tools storage. Make sure your tools are clean and free of debris and dust so they can be used properly. Hang tools and accessories using pegboard hooks.
You can learn how to woodwork.
Learning by doing is the best way of learning anything. Woodworking requires patience, practice and skill. Mastering any craft takes time.
Learning how to do something is best done by doing it. Start small and learn from your mistakes.
Statistics
- In 2014, there were just over 237,000 jobs for all woodworkers, with other wood product manufacturing employing 23 percent; wood kitchen cabinets and countertop manufacturing employing 21 percent. (theartcareerproject.com)
- Woodworkers on the lower end of that spectrum, the bottom 10% to be exact, make roughly $24,000 a year, while the top 10% makes $108,000. (zippia.com)
- The U.S. Bureau of Labor Statistics (BLS) estimates that the number of jobs for woodworkers will decline by 4% between 2019 and 2029. (indeed.com)
- If your lumber isn't as dry as you would like when you purchase it (over 22% in Glen Huey's opinion…probably over 10-15% in my opinion), then it's a good idea to let it acclimate to your workshop for a couple of weeks. (woodandshop.com)
External Links
How To
How to make wood joints
This tutorial will demonstrate how to join two pieces together of wood. We will use the "pockethole joint," which means that we drill holes in the wooden pieces and then glue them together. This method works great if your wood is straight and smooth. If your wood isn't straight or flat, you might want to try another method, such as dowel joinery. These are the steps
-
Drill Pocket Hole Joints. To start, measure and mark where you want to put the pocket hole joint. With a handheld drill machine or jig saw, drill 3/4-inch deep holes in the ends of each piece.
-
Sand Smooth. Sanding the wood's edges will ensure that the joint doesn't split.
-
Glue Together Apply glue to the sides of both wood. Let it sit for about 5 minutes before clamping the pieces together.
-
Connect the pieces. After the glue has dried properly, clamp the pieces together to make sure they are flush.
-
Trim Joinery. Trim the excess wood around the joint after the glue has dried completely.
You should leave enough space between the pieces to allow you to turn them inside-out.