A template will assist you in positioning your patterns on the wooden surface. It gives you reference points for drawing on the wooden surface. Also, a template can be used for repeat pieces. It can be saved to save for future projects. However, it is important to create your template. You can learn more about how to create one. Here are some helpful tips for creating a template to use for wood carving. Then, you can start making your patterns on the wood!
Woodcarving beginner projects
A chess pawn for beginners is a great beginner woodcarving project. This is due to the fact that the pawn has rounded edges, which require more precision in shaping its head. The pawn can be worked on until it is the right shape. This is particularly important for beginners, as you will need 16 identical pieces. This will teach you how to carve curves and balance your work.
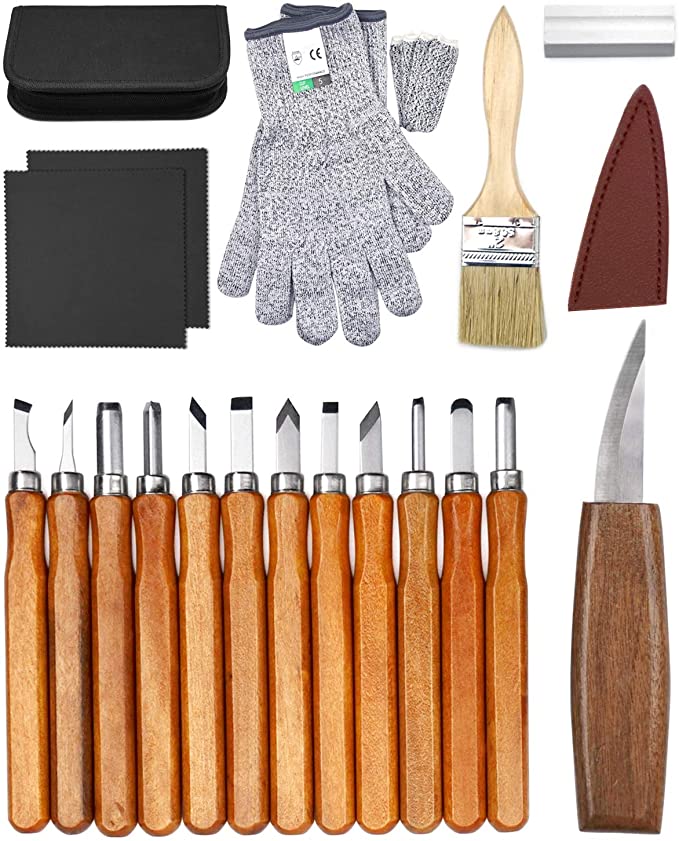
Different wood types require different techniques, depending on the skills you have and the materials available. Some woods are more difficult to carve than others. It is crucial to choose the right tools for the job. A dull tool will make the job more difficult and can cause damage to the wood. For beginners, it is best to start with soft woods like balsa and birch.
3D wood carving patterns
3d wood carving is a good choice for beginners. You can even carve full-size bird figures with this type of pattern. If you're a beginner, it is best to start with a larger piece of wood. 3D designs will require you to switch knives more often. You can also carve bears, either as a cartoon or as a real one.
The bear is a simple animal to carve because it is round and burly. Make a 360-degree carving of the bear and use a reference picture to show the main shapes. Once you have mastered this, you can try a CNC machine or carve the bear by hand. This pattern is flexible enough to be creative in any way. This pattern is a great way for you to learn how to carve, and to create art that will last a lifetime.
Dongyang wood carving
Dongyang Wood Carving is an ancient Chinese art that has been transformed into a distinctive category. The Taihe year is the first time the art form was seen. It dates back to the Tang Dynasty. Dongyang Wood is also often carved using the legend of a white snake. As the name implies, this type of carving is highly detailed. These types of wood carvings are more expensive than others.
Dongyang can be used to decorate any wood surface. These works can both be displayed at home and in public places. A popular example is a piece depicting "The Legend of the White Snake." This story narrates the tale of an immortal snake who fell in love with a young woman. He was imprisoned underneath the Leifeng Pagoda, but he was rescued when the pagoda collapsed and the lake dried.
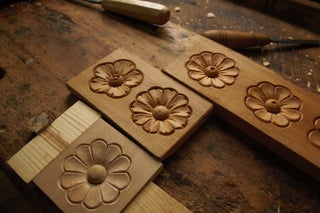
Whittling flower
A whittling floral project may be the right choice for you if you are a beginner woodcarver. There are several ways to carve this beautiful flower, and each one is equally rewarding. Start by drawing the petals of the flower to get an idea of the shape and proportions of the finished product. You can then transfer this design to the wooden chunk. This will enable you visualise the final shape, remove unneeded wood parts, and make carving more enjoyable.
Specialized tools are required to carve flowers. A gouge is useful for cutting the petals and background of the flower. A gouge can be used to cut stems simultaneously, drawing them as you go. A Dremel tool can be used to create intricate flowers. To achieve different shapes, the blade can be adjusted.
Wooden ARO
Aro's wooden ARO drawings make a great way to collect his works. These artists were committed to preserving old traditions and creating works using old objects. Aro transformed a tabletop that was warped into a wooden relief in 1975. Leipaenkeli is Finnish for bread angel. Despite its simplicity, the piece conveys many traditional values. Learn more about this artist by visiting his biography.
Students engage in a multidisciplinary STEAM-based production process in order to create a unique work for a public display. Students may choose to collaborate with a regional or international artist. Students also have a mentor, who is a successful professional in their chosen field, and focuses solely on their own career. The program is designed for students in need and often includes community involvement.
Wooden Cragg
A wide range of woodcarvers have taken to the craft to create amazing pieces of artwork. A popular style is known as 'Pierced Relief,' which involves carving an entire piece of wood from a single block. Other artists are using the process to create abstract pieces that are more abstract, but still contain details of the original piece. Remy Clemente, Morgan Maccari and Morgan Maccari both from France depict a series made of wood frames that have been melted into a metallic frame.
Start with simple patterns if you're just starting woodcarving. After mastering the basics, you will be able to create more intricate designs. To get a feel for the technique, consider printing out drawings of your desired designs. It is a great way to practice. Follow all guidelines and instructions carefully. You will have a lot more success carving wood than you think. There are many different designs that you can choose from, including flowers and fruits as well as animals.
FAQ
Do I have to refinish my furniture?
Yes! Yes! There are many methods to refinish antique furniture without hiring a professional. Here are a few suggestions:
Use sandpaper on the surface to remove any stains or scratches. Finally, use a clean cloth or sponge to clean the surface.
Apply clear polyurethane varnish. Allow furniture to dry completely before you move it around.
Acrylic paint is a great way to paint furniture.
You can stain the furniture instead of using paint. The furniture will have a rich look thanks to the stain.
Apply shellac wax. You can protect your wood with wax and give it shine.
You can learn how to woodwork.
It is best to do it yourself. Woodworking requires patience, practice and skill. Mastering any craft takes time.
Learning how to do something is best done by doing it. Start small and use what you learn.
What wooden items do you sell well?
Most wooden items that are best-sellers are made from wood harvested sustainably.
Most furniture is made from oak, maple, mahogany or walnut.
These woods are strong and durable, with beautiful grain patterns. They can also last for years if they are properly cared for.
To protect wooden furniture from moisture damage, you should paint it first. This applies to all surfaces including drawers, doors, handles, and handles.
A paint that resists water is the best choice to ensure that furniture lasts a long time.
You should use a high-quality oil-based primer followed by two coats of top coat. You may need to apply several coats of top coat depending on how much wear it is expected.
You should avoid using aerosol paints or spray cans. These products have solvents that evaporate quickly, leaving behind dangerous fumes.
What kind of wood should I use?
The most popular types of wood used in woodworking include oak, pine, birch, maple, cherry, mahogany, teak, poplar, redwood, and bamboo. Each type of wood has its own unique characteristics that can affect the final product's appearance. Oak, for instance, is darker and harder than most other woods. Birch is soft and light, and mahogany is denseer and heavier. You can also choose between solid wood and veneers. Veneers consist of thin sheets made from wood and glued together to form a single layer.
How can you calculate the woodworking price?
It is crucial to keep project costs as low-cost as possible. Always ensure you are getting the best possible price for materials. It is also important to consider the costs of other factors, such time, skill, and experience. Our guide to the average household DIY task price will give you an idea of how much it costs to complete different types of woodwork projects.
How much will it cost to get started?
Because every project is unique, there aren't exact numbers. Consider these factors if you need to estimate the amount of money that you will require.
-
Material cost
-
Tools and equipment
-
Time spent working on this project
-
Hourly rate
-
What amount of profit can you expect to make?
-
It doesn't matter if your goal is to hire help
If you're just starting out, you may decide to start small by making simple items such as boxes and picture frames. As you gain more experience, you will be able tackle more complicated projects.
Statistics
- Woodworkers on the lower end of that spectrum, the bottom 10% to be exact, make roughly $24,000 a year, while the top 10% makes $108,000. (zippia.com)
- Average lumber prices rose about 600 percent between April 2020 and May 2021. (familyhandyman.com)
- Overall employment of woodworkers is projected to grow 8 percent from 2020 to 2030, about as fast as the average for all occupations. (bls.gov)
- The U.S. Bureau of Labor Statistics (BLS) estimates that the number of jobs for woodworkers will decline by 4% between 2019 and 2029. (indeed.com)
External Links
How To
How to join hardwood without using nails
Many people love woodworking. It is relaxing and enjoyable because you can create something useful with wood. Sometimes you may want to join two pieces together of wood without using nails. This article will help you to maintain the beauty of your woodwork projects.
The first thing you'll need to do is cut off any rough edges from your pieces of wood before joining them together. Do not leave any sharp corners as they could cause problems down in the future. Once you've done this, you're ready to start gluing your boards together.
If you are working on hardwood, you should only use glue on one side. You should glue both sides if you are working with softwoods such as pine and cedar. Once the glue has dried, press the boards together until they are fully adhered. Be sure to let the glue dry before you move on to the next step.
Once you've glued your boards together you will need to drill holes in the joints to accommodate screws. Depending on what type screw you choose, the size of these holes will depend on how big they are. For example, if you're going to use a 1/2-inch wood screw, then you should drill a hole that is at least 3/4 inches deep.
After drilling the holes, you can drive the screws into your board's backside. Don't hit the board's surface. You could damage the finish. Avoid hitting the screws' ends too often when driving screws. This will avoid splitting in the wood's ends grain.
Protect your finished project now. You can either cover the entire furniture or just the top. You want it to last years, so you can use any product. Some examples include oil-based varnishes, polyurethane, shellac, lacquer, etc.
These products can generally be found in any home improvement shop. It is important to ensure that you purchase the correct product for the job. Also, remember that some finishes are toxic and should never be used indoors. Wear protective gear whenever you are handling them.