There are many ways you can carve a gnome. There are a few important details to consider before you start carving. This project is both fun and rewarding, in addition to the actual carving. This project requires many layers, and it is a great way for beginners to learn how to carve an gnome. There are many creative ways to enhance your gnome carving. These are just three tips for carving a wood gnome.
Freehand carving of a gnome
These tips will help you succeed when carving a gnome freehand for Christmas ornaments. While it is possible to carve a gnome using only a knife, a micro V-tool is necessary if you want to add fine details to the hat rim or beard. A gnome can be carved in a few hours.
Freehand carving is fun with the gnome. These gnomes were once common garden ornaments. They are still in use in many countries. You can gauge your ability to carve gnomes from wood and find areas you need to improve. It will also be an excellent measuring stick for design, detail, and depth. Once you are proficient at drawing the gnome, it is possible to start carving his features.
Whistle carving is a project that every woodcarver should try.
A whistle is a great project for woodcarvers. A simple, yet functional object, a whistle will be fun to carve and is an excellent way to introduce your friends and family to the process. However, there are several important steps to follow if you want your whistle to be a functional piece. In this tutorial, we will cover the steps involved in carving a whistle, from preparation to the final product.
To start the project, you'll first need a straight edged knife and nontoxic oil. While carving a gnome might seem daunting, it's actually quite simple and will enhance your woodcarving skills. This is a great project for beginners, and you can practice many woodcarving skills.
Creative gnome carvings: Add creativity
A colorful hat can add creativity to gnome carvings. A wood-carved wooden gnome might be a whimsical decoration. But a sneering, angry troll could make your heart melt. Gnomes are an excellent way to add personality to your garden, and this can be done with various materials, such as wood, stone, and stone.
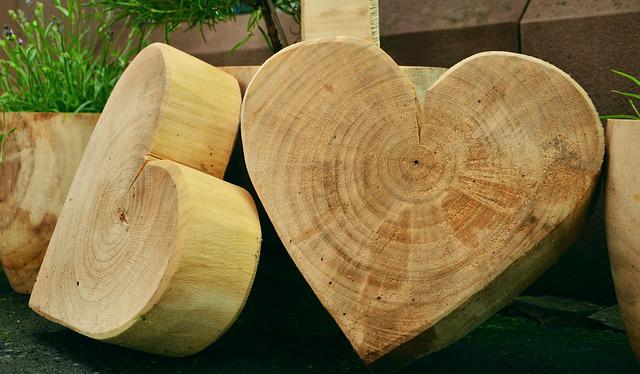
Creating a gnome out of wood
When carving a gnome out of wood, the first thing you need to do is determine the size of your wood block. Then, draw the anatomy of the gnome, including its face, body and feet. To create smooth corners, create V-cuts in certain areas of the face. With a chisel/knife, cut V-cuts where needed. Next, use a micro V tool to cut a piece about 1.5mm thick of wood. This will give you a nice curled edge for the beard and hat rim.
It is easy to carve a gnome. This is because there is so much potential to produce high-quality work. By carving a gnome once a week, you can expect to see progress in every step. While this may not happen with every project, weekly carving progress will allow you to make noticeable improvements in design, shape, and facial features.
Adding a gnome to a world of gnomes
The Gnomes of the Underdark and other RPGs usually have one recurring character: David. This character isn’t insane. He has traits like Speak Fluent Animal, Can't Argue with Elves, and Telepathy. He can also be seen putting up road signs in an attempt to scare people. David and Lisa may have a rivalry.
Gnomes are powerful arcana casters. They are the only race that can be played in the game. Other gnomes have the same skeleton animation, such as the undead, and the leper gnomes. Kirin Tor has had a strong presence of gnomes for a long time. Meryl Felstorm was their founding member. He had a gnome to his credit.
FAQ
What's the difference between plywood vs particle board?
Plywood is made up of layers of wood pressed together under pressure. Plywood comes with a range of thicknesses, and it is most commonly used for flooring and cabinets. Particle board is made up of sawdust mixed in resin, then compressed into large pieces. It's often used for home renovation projects. Both types of boards are durable and easy to cut.
Which wooden items are very popular?
The best-selling wooden items are those which have been made from wood that was harvested sustainably.
The most used wood types for furniture are oak, maple and walnut.
These woods are extremely strong but also have beautiful colors and grain patterns. If they are well cared for, they can last many years.
To prevent moisture damage to wood furniture, it is important that it be painted before any other surfaces. This applies to all surfaces including drawers, doors, handles, and handles.
If you want to make sure that your furniture lasts as long as possible, then you should choose a paint that is resistant to water.
Followed by two coats, you should apply a quality oil-based primer. Depending on how much wear you expect, you might need to apply more coats of topcoat.
Spray cans or aerosol paints should be avoided. These products can evaporate quickly and emit harmful fumes.
What furniture can I refinish?
Yes! Yes! There are many methods to refinish antique furniture without hiring a professional. Here are a few ideas:
To remove stains and scratches, use sandpaper. Next, wipe the surface clean with a damp cloth.
Use clear polyurethane varnish. Before moving furniture, let dry completely.
Acrylic paint is a great way to paint furniture.
Stain can be used instead of paint. The furniture will have a rich look thanks to the stain.
Use shellac wax. This will protect and shine the wood.
How do you know which type of wood you are working with?
Always inspect the label when buying wood. The label should contain information about the wood species, its moisture content, and whether it has been treated with preservatives.
How much should a hobbyist invest to get started?
If you're looking to start your own woodworking business, you'll probably need some capital to buy the necessary tools and supplies. You can start by purchasing a small table saw and drill press as well as a circular saw, circular saw, jigsaw and sanding machines. These items aren’t too expensive so you won’t have to break the bank.
You can learn how to woodwork.
The best way to learn anything is by doing. Woodworking is an art form that requires patience, practice, skill, and experience. It takes time to master any craft.
Learning how to do something is best done by doing it. Start small and learn from your mistakes.
What tools do I need to start as a woodworker and what should I learn?
Woodworking is an art. It requires patience. It takes time and practice to master the various techniques and tools required for woodworking.
There are many different types of woodworking equipment available on the market today. Some prefer to use power tools and others prefer hand tools.
Your choice, however, is up to you. However, you need to ensure that the tool you use is the right one for the job. You might start with a simple set of tools if you don't have much experience.
You might also want to learn how a router works, which allows you to cut wood into intricate shapes. These routers can be purchased at most hardware and home improvement stores.
Statistics
- Overall employment of woodworkers is projected to grow 8 percent from 2020 to 2030, about as fast as the average for all occupations. (bls.gov)
- The best-paid 10 percent make $76,000, while the lowest-paid 10 percent make $34,000. (zippia.com)
- In 2014, there were just over 237,000 jobs for all woodworkers, with other wood product manufacturing employing 23 percent; wood kitchen cabinets and countertop manufacturing employing 21 percent. (theartcareerproject.com)
- The U.S. Bureau of Labor Statistics (BLS) estimates that the number of jobs for woodworkers will decline by 4% between 2019 and 2029. (indeed.com)
External Links
How To
How to join wooden boards without using nails
Woodworking is an enjoyable hobby. You can make useful items from wood with your hands, which is both relaxing and fun. You may need to join two pieces without the use of nails. This article will explain how to do this so that your woodwork projects stay beautiful.
You will first need to trim the edges of your wood pieces before joining them. You don't want to leave sharp corners that could cause problems later on down the road. Now you can start gluing the boards together.
If you are working on hardwood, you should only use glue on one side. For softwoods like cedar and pine, glue should be applied to both sides. Press the boards down until the glue is fully incorporated. After applying the glue, let dry the boards before proceeding to the next stage.
After you have glued your boards, drill holes where you want to insert screws. Depending on what type screw you choose, the size of these holes will depend on how big they are. If you plan to use a 1/2 inch wood screw, drill a hole at least 3/4 inches in depth.
After drilling your holes, drive the screws into the board's backside. Avoid hitting the board's top surface. Otherwise, you could ruin the finish. Don't drive the screws too far into the end. This will avoid splitting in the wood's ends grain.
You'll need to protect your completed project from the elements. You have two options: seal the whole furniture piece or just the top. It doesn't matter what method you use, you want something that will last many years. Examples include oil-based varnishes and polyurethanes, shellac, lacquer and others.
You can find these products at most home improvement stores. It is important to ensure that you purchase the correct product for the job. Don't forget to keep in mind that some finishes are toxic. Wear protective gear whenever you are handling them.