
The cost of lumber is on the rise and can lead to a decrease in the profitability of retailers and contractors. To combat the rising cost of lumber, one way to keep costs down is to buy it in larger quantities. Bulk purchases from most suppliers offer significant discounts which makes them more cost-effective than purchasing small quantities or as needed.
Incorrectnesses to be checked
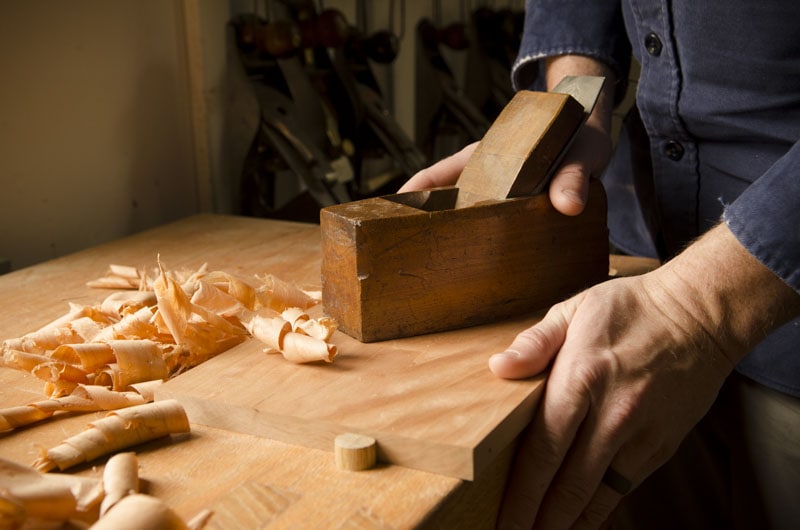
Although imperfections in lumber can add to their character, it is best to reduce them for structural strength. Most defects are caused by problems during stacking, cutting, or drying. An exception to this rule is a naturally occurring, knot. Knots, also known as "bends", are a type of imperfection that occurs in wood. Knots are caused when tree branches are broken and they are not structurally damaging. These are the signs that lumber will not last:

Choose the right wood for you project
The factors that will determine the wood you choose for your project include your preference, budget, and size. Beginners are best served by the least expensive woods. Soft maple, poplar, pine, and other woods are inexpensive and simple to work with. Hardwoods, like oak and Elm, are usually more expensive. The best wood to use for your project is one that considers the wood's qualities and uses.
How to choose the right mill
There are many options to choose from when buying lumber. The 2 x 4 lumber you can buy at your local big box stores is inexpensive, but it may be more expensive for a piece of higher quality lumber. For instance, a sawmill might use six passes to cut a 2" thick piece. These smaller family-owned mills tend to be more expensive in terms of pricing. For high-quality, high-quality lumber, it is better to choose a mill with a solid reputation.
Choosing the right size
There are several things to keep in mind when purchasing lumber. The exact purpose of the lumber will affect the type of lumber you select. The lumber's quantity and size can be seen on its sides. It is important to read the information. It is important to know the information. Below are some suggestions to help you make the right decision.
Selecting the right grade
A stamp that identifies the lumber's grade is a must when purchasing lumber. This will tell you about the grading agency and the mill designation of the lumber you buy. Your needs will determine the grade you choose, whether it is structurally sound or finishable. It is also important to consider the color of the wood, which will affect the appearance of the project.
FAQ
What is the average time it takes to finish furniture?
It depends on the size and condition of the furniture. For smaller projects such as picture frames and boxes, it can take less than a day to complete. Larger projects, such as desks and dining tables, can take several days. It takes time and effort to properly stain the wood.
Where to Buy Hardwood Lumber?
Home Depot offers hardwood lumber. They sell all kinds of wood products, including flooring, cabinets, furniture, etc.
A large variety of engineered hardwoods is available to them, including Ipe (Araucaria Angustifolia), Brazilian Cherry and Peau d'Arco.
These woods are available online by searching Google for "hardwood lumber".
What's the difference?
Hobbyists like making things with wood. Professionals focus more on quality. Hobbyists usually take pride in their creations and often share them with friends and family. Before they start working on a project, professionals will spend hours researching the designs. They will meticulously plan every detail of their work from choosing the right materials to finishing it.
What is the minimum amount I will need to start?
Because each project is unique there are no exact numbers. But if you want to get an idea of how much money you'll need, consider these factors:
-
Material costs
-
Tools and equipment
-
Time spent on the Project
-
Hourly rate
-
How much profit can you anticipate to make
-
Whether you plan to hire help
You might start small if you are just starting out. As you gain experience, you'll be able to tackle more complex projects.
What woods are suitable for making furniture?
Woods are classified based on their hardness. Softwoods include cedar, pine, cedar, and Cypress. Because they are resistant, they can be used for outdoor furniture. Hardwoods include oak, maple, mahogany, and teak. Because they can't weather outside, they're usually used indoors.
Statistics
- In 2014, there were just over 237,000 jobs for all woodworkers, with other wood product manufacturing employing 23 percent; wood kitchen cabinets and countertop manufacturing employing 21 percent. (theartcareerproject.com)
- If your lumber isn't as dry as you would like when you purchase it (over 22% in Glen Huey's opinion…probably over 10-15% in my opinion), then it's a good idea to let it acclimate to your workshop for a couple of weeks. (woodandshop.com)
- The U.S. Bureau of Labor Statistics (BLS) estimates that the number of jobs for woodworkers will decline by 4% between 2019 and 2029. (indeed.com)
- Most woodworkers agree that lumber moisture needs to be under 10% for building furniture. (woodandshop.com)
External Links
How To
How to join wooden boards without using nails
Woodworking is a favorite hobby. It is relaxing and enjoyable because you can create something useful with wood. You might want to join two pieces from the same wood, but you don't need to use nails. This article will explain how to do this so that your woodwork projects stay beautiful.
Before you can join the wood pieces together, you need to remove any rough edges. Do not leave any sharp corners as they could cause problems down in the future. Once you've done this, you're ready to start gluing your boards together.
If you are working with hardwood, only one side should be glue. If you're using softwoods like pine or cedar, you should put glue on both sides. Once the glue has dried, press the boards together until they are fully adhered. Make sure you let the glue dry before moving on to the next step.
After you glue your boards together, drill holes at the joints where screws will be inserted. The size of these holes depends on what type of screw you choose to use. For example, if you're going to use a 1/2-inch wood screw, then you should drill a hole that is at least 3/4 inches deep.
Once you have drilled the holes, the next step is to drive your screws through the joint into the board's backside. Don't hit the board's surface. You could damage the finish. When driving the screws, try to avoid hitting the ends of the screws too much. This will help prevent splitting of the end grain.
Once your project is complete, it's time to protect it against the elements. You can either seal the entire piece of furniture or cover the top. You want it to last years, so you can use any product. Some examples include oil-based varnishes, polyurethane, shellac, lacquer, etc.
These products can usually be found at any home improvement store. Be sure to choose the right one for your project. Remember that some finishes can be toxic, so you should not use them indoors. Wear protective gear whenever you are handling them.